The Avalanche Lake Trail is a beautiful wooded hike in Glacier Park. It is an extremely popular out-and-back hike in the park and follows the mostly whitewater Avalanche Creek to the gorgeous Avalanche Lake.
Getting to the trailhead requires a park pass to Glacier National Park as well as a pass to drive Going-to-the-Sun road. If you can’t secure a driving pass on Going-to-the-Sun road you can take the free shuttle service. We secured a road pass by booking a boat trip on Lake MacDonald, which you might find easier than getting a pass for the road by itself.
We found parking to be a little hard to come by, so you’ll either need to be patient and circle the lot next to the Trail of the Cedars for a while or arrive early in the day. Avalanche Lake Trail is around 5 miles round-trip, so you’ll definitely want to bring along some water, maybe a snack, and someone in your group should have bear spray.
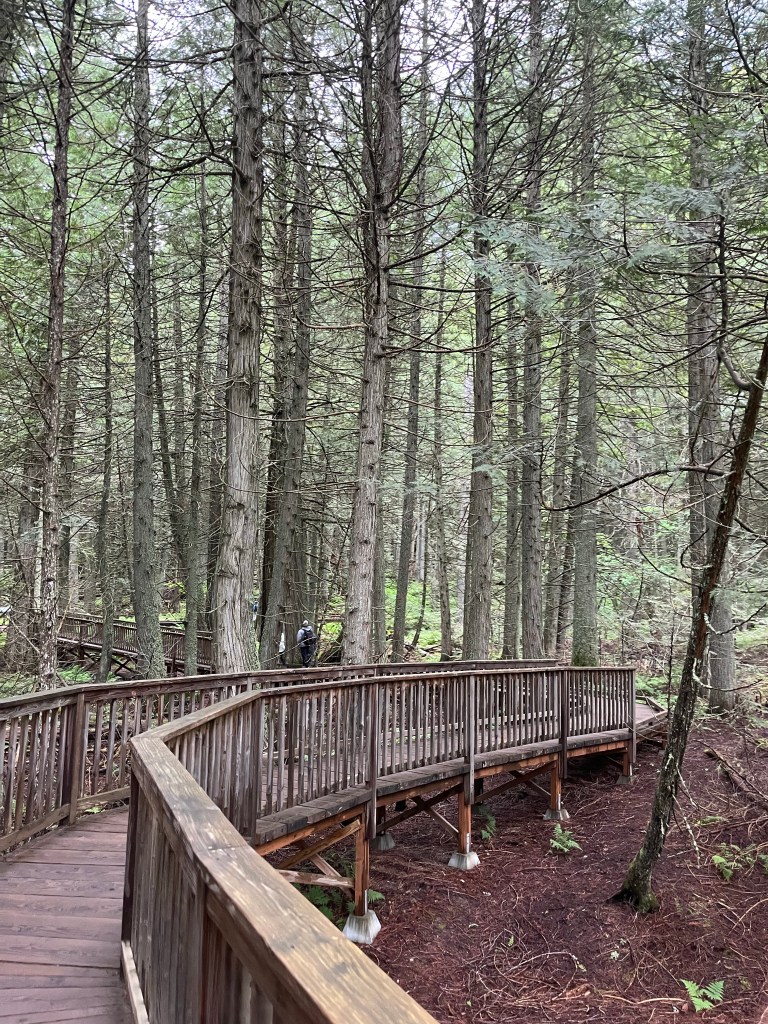
We started on Trail of the Cedars, which is a very flat, easily accessible trail. It has a lot of wooden walkways to make things easier for folks with limited mobility.
Elevated walkway in Trail of the Cedars
This is a very serene hike with tall, thin cedar trees everywhere. It is a very heavily traveled path because of how easy it is to hike. We saw a lot of parents hiking with their young children who wouldn’t be capable of doing a more difficult hike.
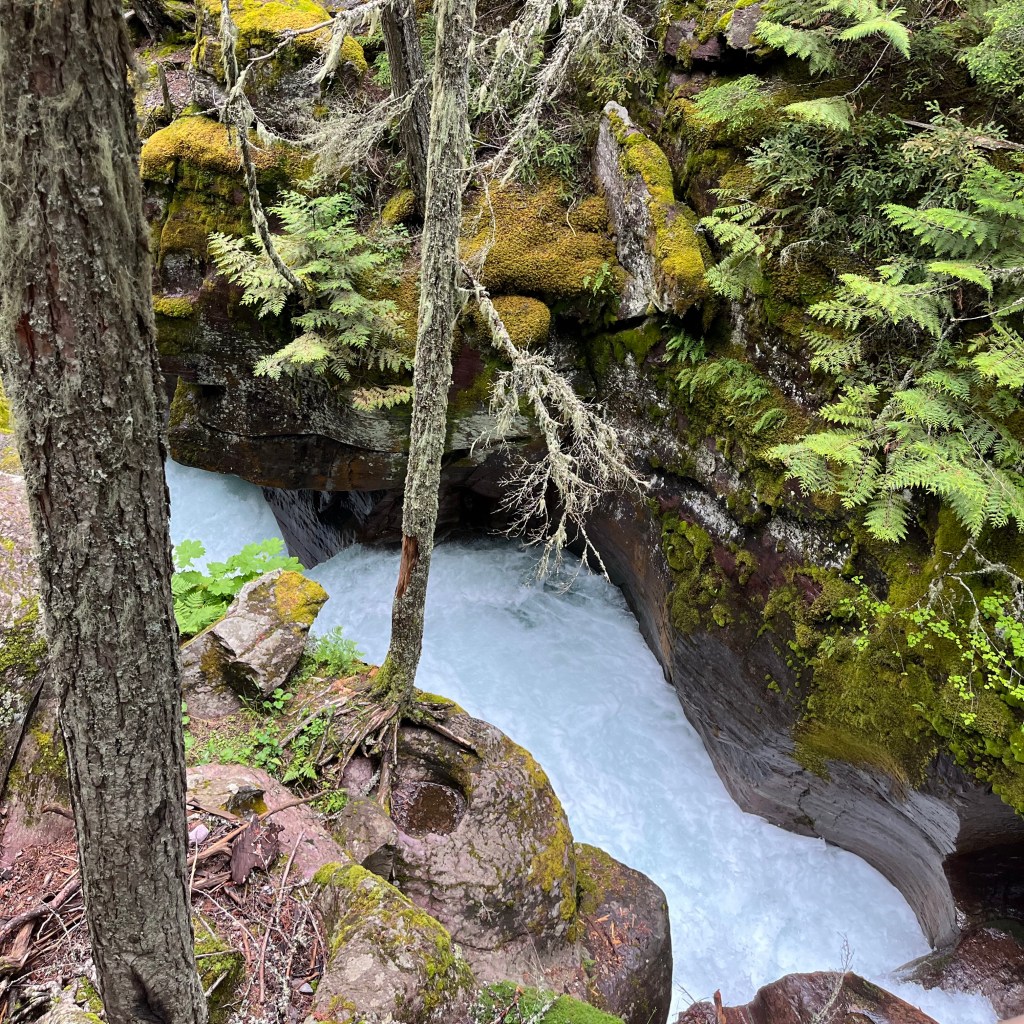
Avalanche Creek carving out a passage in rock
Along the Trail of the Cedars is the Avalanche Lake trailhead and there is a park sign marking the entrance. Once you leave the Trail of the Cedars for Avalanche Lake Trail, the hike becomes more challenging. Alltrails.com has Trail of the Cedars rated as an easy hike and Avalanche Lake Trail as moderate. For most people, Avalanche Lake Trail will be fairly easy to hike, but you should be aware of your personal fitness before getting two miles into the hike and regretting your life’s decisions.
In some areas Avalanche Creek is somewhat narrow
The Avalanche Lake Trail roughly follows Avalanche Creek from the trailhead until you reach the lake. This is a fast flowing, whitewater creek. The creek in some spots has carved out smooth mini-canyons and in other spots opens up into wide rapids flowing over smooth river rock.
Where Avalanche Creek hasn’t been restricted by a rocky passage it opens up and widens into rapids.
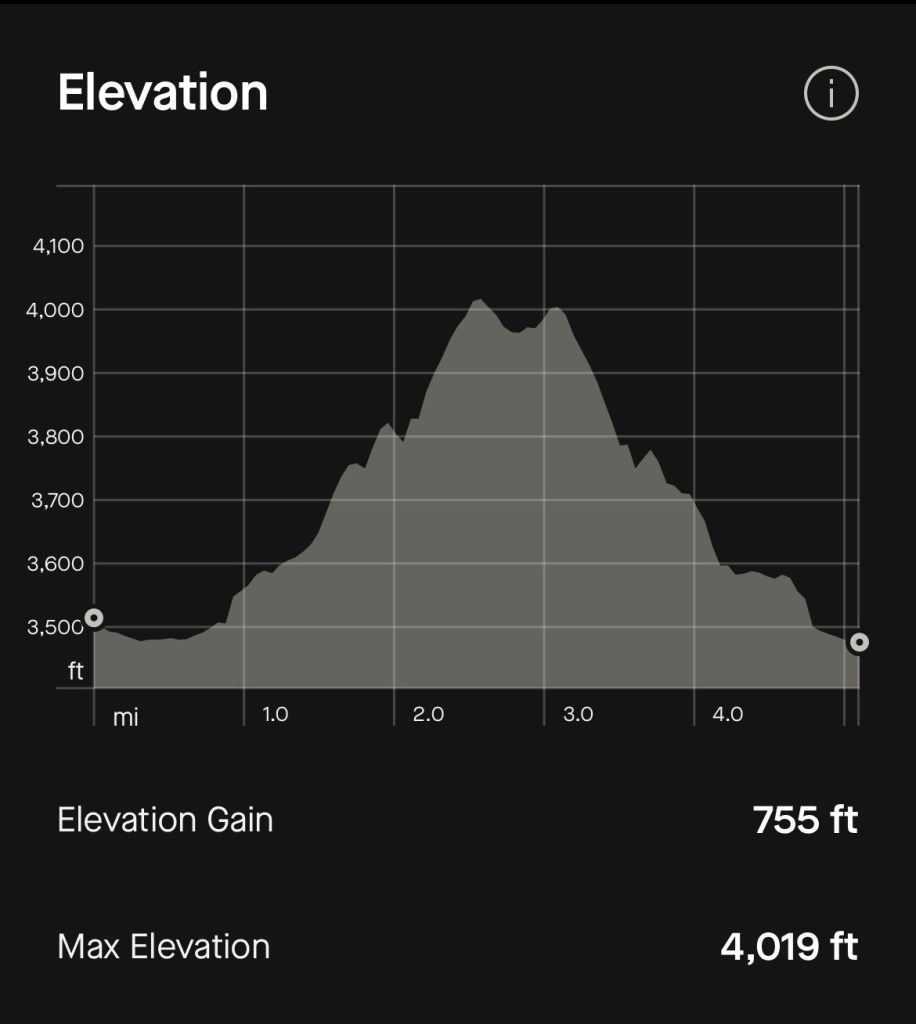
According the data recorded from my Garmin on the hike, the hike to the lake is about 2 1/2 miles and the elevation goes from around 3,500 feet above sea level to around 4,000 feet in that span, The creek basically has the same stats. Any time a creek has a 500 foot drop over a couple of miles, there will be a lot of whitewater.
There are plenty of times that the trail veers away from the creek which lets you enjoy the forest. Most of the trail itself is fairly wide and comfortable to walk. There is quite a bit of traffic on the trail, but because the trail is wide, there is plenty of room to maneuver around other hikers.
Some of the mountains in the area of the trail.
After a little over a couple of miles, we arrived at the lake. In my opinion, there is nothing more stunning than a mountain lake, and this is a breathtaking one. The beach is filled with smooth rocks and the water is crystal clear. The water was extremely calm which made for a perfect mirror of the sky and mountains in the background.
Avalanche Lake from the beach at the end of the trail
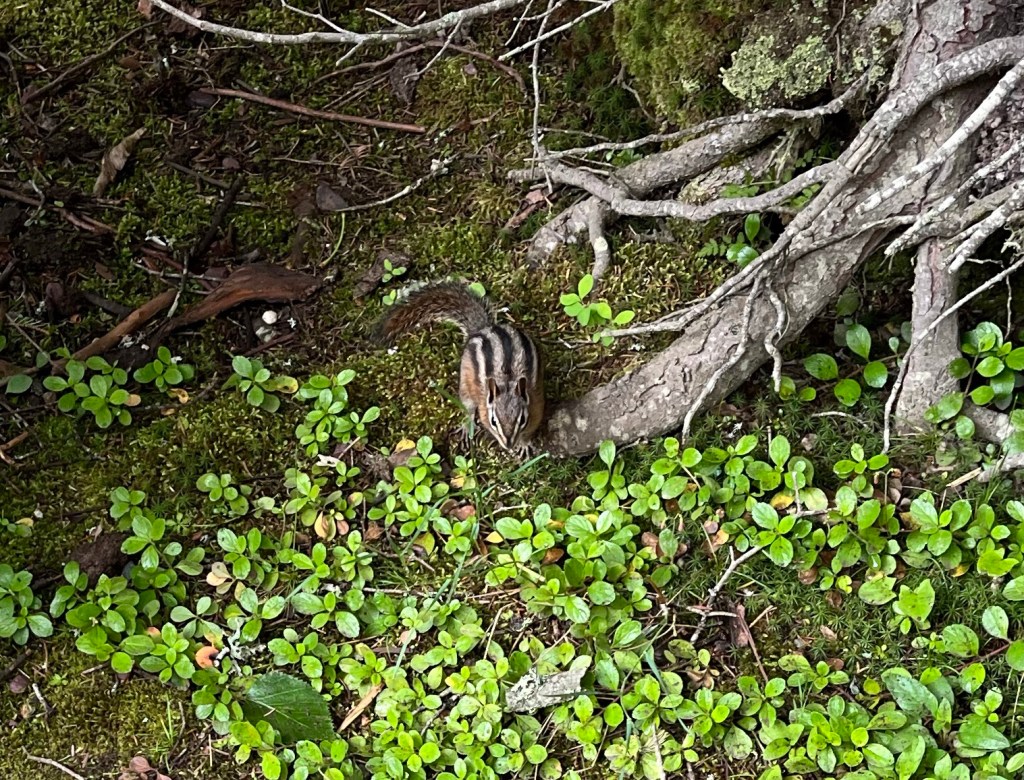
The shore itself was lined with hikers and we found a little chipmunk who had grown accustomed to begging for snacks from the hikers. He was rewarded by one who gave him a little chunk of a snack bar.
Fairly tame chipmunk
While we were there, I caught the end of what was a young man proposing to a young woman in front of their friends and family. She said yes, and everyone cheered. Congratulations to the happy couple and I have to say that was an excellent choice of location for the proposal.
Avalanche Lake
After resting, having a snack, congratulating the couple, and taking a ton of photos and selfies, we headed back to the trail. The hike back is quite a bit easier, since now its dropping 500 feet over 2 1/2 miles instead of climbing it.
Tall pines along the trail
It gave us a second chance to view all of those beautiful rapids that the creek has created on our way back to the parking lot.
Avalanche Creek
The Avalanche Lake Trail is the most consistently beautiful trail that I’ve ever hiked. From the pine trees, to the mountains, to the whitewater and finally the calm mountain lake, there just isn’t a boring or ugly spot on this trail. It is beautiful from beginning to end and I would recommend this trail to anyone who has the opportunity to take it.
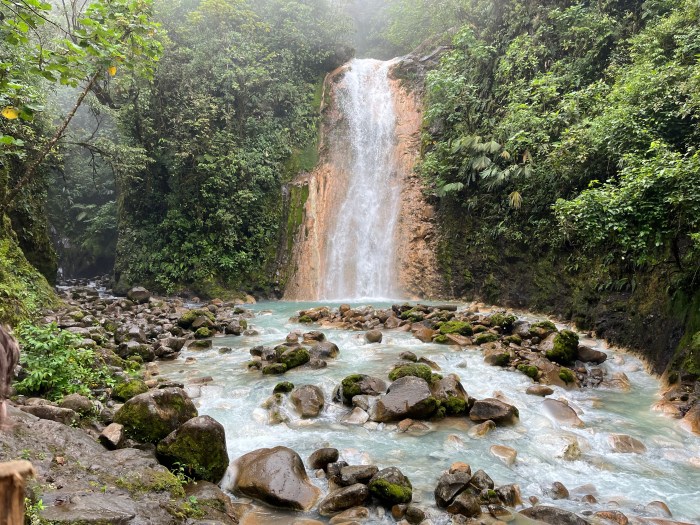
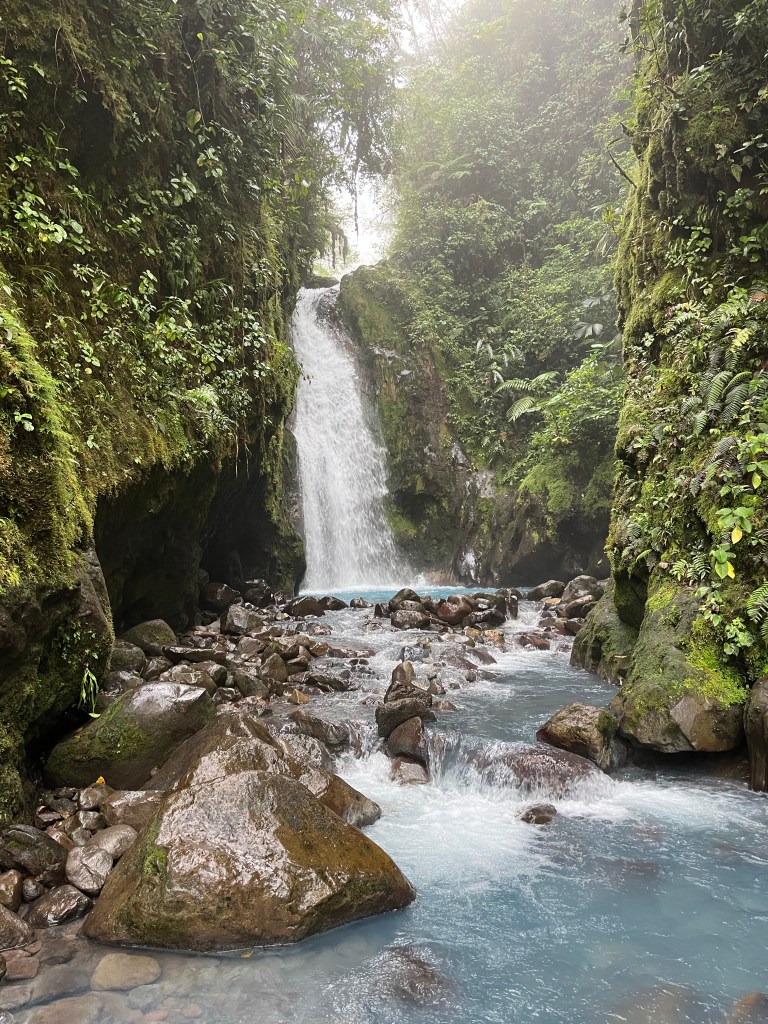
The Blue Falls of Costa Rica are a group of seven gorgeous waterfalls set on a tributary to Rio Toro. The river is fed by runoff from the northwest slope of Poas Volcano and is a seemingly unnatural shade of blue due to a high concentration of aluminum sulfate. This aquamarine colored water flowing over rocky terrain makes for an unbelievable landscape of pools, waterfalls and rapids.
There is a tour company that maintains the Blue Falls as well as Catarata Del Toro, which is another waterfall on the same property, but it is on Rio Toro, not on the tributary where the Blue Falls are located. They take admission for both attractions and have a station where you can pay, use the restrooms and potentially get some food, although the snack bar was not open the day we were there.
When we arrived at the visitor center, we were greeted by a gentleman who asked us whether we would be doing Catarata Del Toro, the Blue Falls or both. We paid for the Blue Falls, and he gave us our wristbands for entrance and instructions to go back to our cars and drive up the road a bit and park in a different lot and enter there.
The first river crossing is literally a few inches wide. Only 2 people are allowed on this bridge at a time.
The crazy thing about this gentleman was that, while we were standing there, he also was giving instructions to other hikers and I’m not 100% sure, but it sounded like to one group of hikers he spoke in Dutch (maybe German) and another in French while he was talking to us in pretty flawless English. I’m pretty sure he probably speaks Spanish as well, but the fact that he was just switching back and forth between languages that quickly was amazing to me. I asked him how many languages he knew, and he just responded humbly with “oh, a couple”.
This was early along the road, as you continue to walk the rocks have been moved into the center of the road to operate more like a sidewalk.
We moved the car to the parking lot by the Blue Falls entrance and began our hike. There is a dirt road to follow for the first half to three quarters of a mile. The dirt road had basically turned to mud, which I’m sure is the case a lot of the time. There was a row of stones in the center where most people walk to avoid the mud.
Little “sidewalk” like rock formation to help hikers stay out of the mud
At the end of the road, we came across some signs pointing to where to find the falls. Three trails to the left – La Pintada, La Turquesa and La Celestial, and three trails to the right – Poza Azul, Las Gemelas, and Tepezquintle. Las Gemeles is one trail with two waterfalls.
La Celestial Waterfall
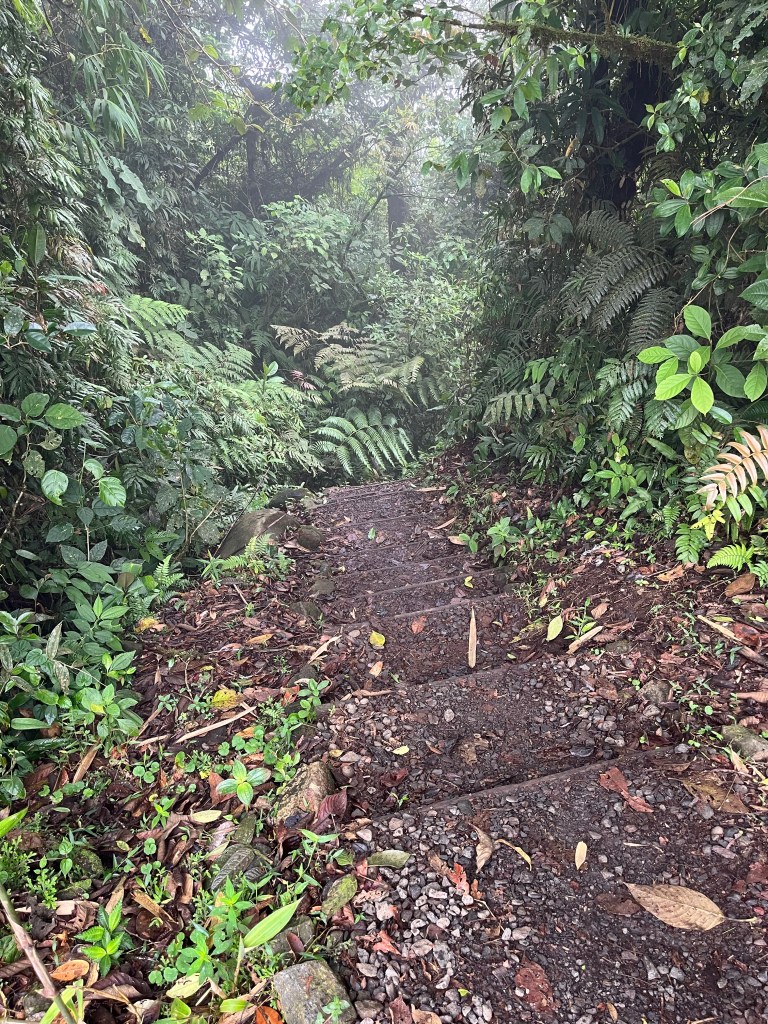
Makeshift stairs on the trail to La Celestial
We decided to visit La Celestial first. Once we started to hike down the actual trail to La Celestial, the trail became more like forest stairs for lack of a better term. The trail has been altered to be more like steps. As wet as this area is, I assume that without the steps it would be incredibly slippery.
There are metal stairs on the trails where the trail would be too dangerous without them.
There were other sections that had some makeshift metal stairs and railings. As we got closer to the falls, the steps made way to boulders. As we descended down the trail, the sound of the waterfall grew in intensity until finally the waterfall appeared in view.
La Celestial waterfall taken from the end of the trail
La Celestial is fairly wide with quite a bit of water coming over it. It’s probably about 30 feet tall and has a bit of a pool under the waterfall. I don’t know how deep the pool is because, I didn’t get more than about waist deep there.
The family enjoying La Celestial
The water is fairly cold, which wasn’t unexpected, since it is running off of a mountain, but it’s not so cold as to want to avoid it completely.
A group of rocks about 50 to 100 feet from the falls creates a pool under and near the falls which you can swim in.
We hung out there for about 15 minutes enjoying the waterfall and the cold water and then decided to go back to the trail to head over to our second waterfall, La Turquesa
La Turquesa
The trail down to La Turquesa seemed much easier than the trail down to La Celestial. There still was quite a bit of steps on the way down, however, once we reached the river, we came across a metal structure with a ladder. There was a guide there to greet us.
A fairly typical trail at Blue Falls. It’s been altered to be more like steps,
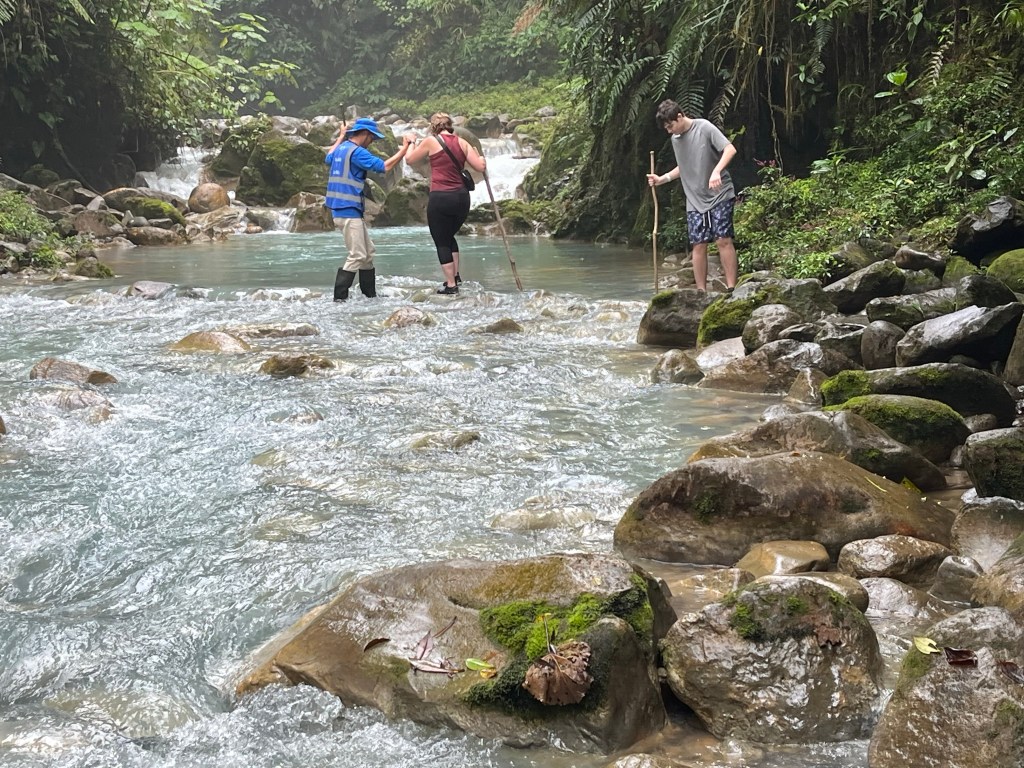
In order to get to La Turquesa, you have to cross the river. The guide showed us the right place to cross and helped us through some of the more treacherous parts of the trail, which at this point mostly consisted of stepping on wet slippery rocks.
Guide helping Jenn across the river on the trail to La Turquesa
There is a fairly brisk section of rapids that we needed to climb over to that was the last main obstacle to getting to the falls. In this section, we had to climb over a boulder to get there. The guide was very helpful in making sure that none of us slipped on the boulder.
You need to climb over this boulder to get to La Turquesa.
The reward for this hike is a probably one of the shorter falls here, but it has a really nice pool area where you can kind of relax a little and swim, if you can stand the cold water. I got in up to my neck, but Alex actually dunked his head. Emma bet him $5 he wouldn’t do it.
La Turquesa
This was a really calm and relaxing area to hang out in. We stayed for a little while and then decided to head back to the trail and go down one last trail.
Las Gemelas
We headed back up to the main trail, and we knew that we probably only had one more trail left in us. The hiking at the Blue Falls is somewhat challenging and some fatigue was beginning to set in. Jenn suggested we see Las Gemelas (The Twins). It was a great choice.
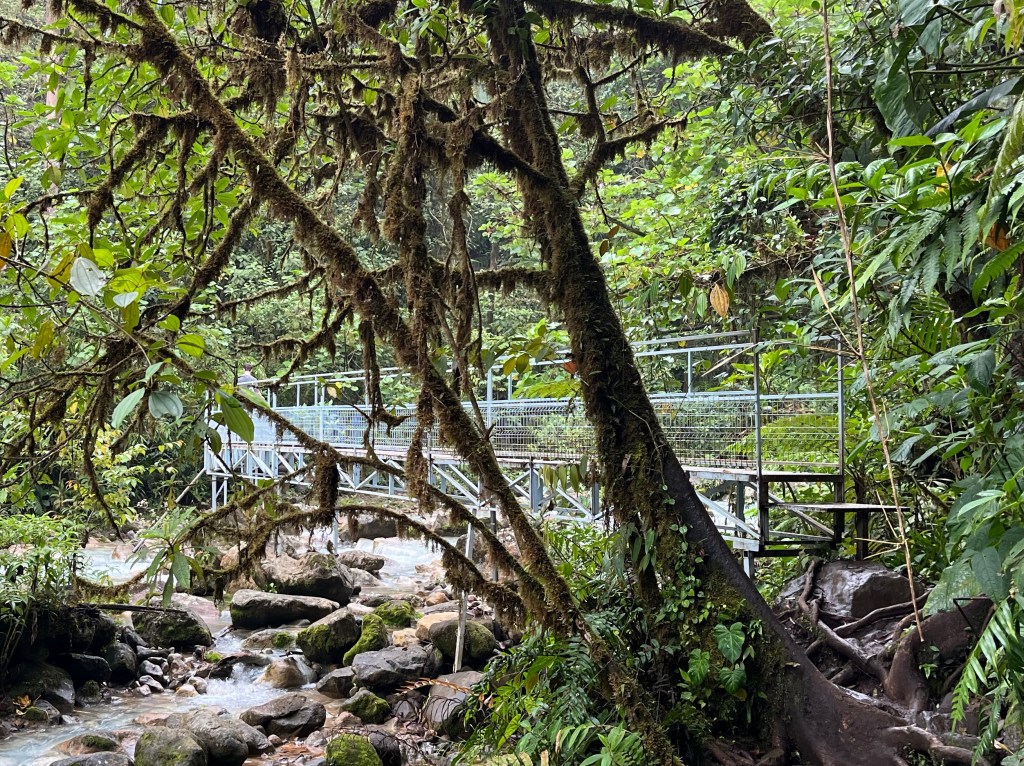
A metal bridge over the river at La Gemelas
Once we got down to the river from the main trail, we were greeted by a narrow metal bridge.
Once you crossed that, the trail mostly stayed dry on the left side of the river as we approached the first of the two twins.
The first of the falls at La Gemelas
This was easily the tallest of the waterfalls we had seen that day.
Once you walk closer to the first of the twins and can see further down the river, the second of the twins appear in view.
The second of the falls at La Gemelas
There is a location on the left side of the river, where both waterfalls can be seen simultaneously. This is a surreal spot.
Standing where both of La Gemelas can be seen.
At this point of the day we were pretty hungry and tired and were ready to head back. We hiked back to the main trail and then to our car.
Getting to Blue Falls of Costa Rica
We drove to the Blue Falls from Grecia, but in general if you are coming from San Jose or the Central Valley you will be coming over a fairly tall ridge on Ruta Nacional 708 from the south. I mention this for one specific reason, that is the steepest section of road I have ever driven on.
The steep section I’m talking about is a very new road, but as we were descending the mountain, I suddenly got terrified because I knew I would have to drive back up this mountain, and I rented a Geely GX3. It has a not at all impressive 102 horsepower, and I had 4 full-sized Americans that had to ride in this car up this insane grade. Long story short, we made it, it was terrifying and my speed going up this grade was about 5 MPH with the pedal on the floor. I would suggest maybe a more powerful car if you are going to attempt this drive.
Much of the drive is typical of rural Costa Rica with narrow roads, switchbacks, and limited visibility. We did come across some pretty sketchy bridges made of wood near the end of the drive. At one point I asked Jenn “Was there a hole in that bridge?” She replied as calmly as she could “Yep.”
If you are coming from La Fortuna, you will probably be coming down from the north, so you wouldn’t have the steep grade that we had to deal with. That being said, I have no experience with the roads from La Fortuna, so I don’t know what they are like.
What to Wear at the Blue Falls of Costa Rica
You need to be prepared to get wet and muddy. You also need to have shoes that don’t slip. This does present a challenge for me, because frankly I’m a big fan of wearing socks and you’re not going to want to wear socks. They are going to get wet and your feet are going to prune, and you will be hating your life decisions.
Rocks are wet and slippery. Make sure your shoes grip properly.
You will also be walking on some extremely slick rocks. Having a pair of water shoes that have excellent grip that you can wear in the water is essential. They should also be a good fit, because as you can imagine, wearing ill-fitting shoes on a hike without socks can cause blisters in a hurry.
The alternative to water shoes is to do what the guides do and wear rubber boots. I’m pretty sure the guides know what they are doing, so following their lead can’t be a bad idea.
As far as your clothes are concerned, again you need to take into account the fact that you are both hiking and swimming. A swimsuit might not cover as much as you want when you are hiking and hiking clothes might be too heavy and uncomfortable once you get them wet. I settled on a quick dry shirt and a pair of board shorts. That seemed to be a pretty good compromise. Keep in mind the trails are pretty well maintained so you probably don’t need to cover your legs from things like thorns.
Other Considerations
We didn’t plan out our day very well. We had a light breakfast before driving an hour to get to the falls. A couple of hours of hiking had made us pretty hungry and we had not brought anything to eat. We basically quit out of fatigue, but if we had decided to do all of the falls, it would have taken us a bit more time and we would’ve been extremely hungry.
I would recommend packing a lunch if you want to do the entire Blue Falls hike. I think you could probably do the whole hike in 2 or 3 hours, but honestly, why are you hurrying? It’s beautiful, chill out and swim in the pools for a while. If you’re really enjoying the hike, I would think it would take you at least 4 hours, maybe longer, and with the amount of calories you’ll be burning with constantly going up and downhill, you’ll probably want something to replenish your energy.
I took along a regular backpack, but this is a very wet area, and the chance of accidentally falling into the river is fairly high. I would recommend using a dry bag or a dry backpack. I was carrying everyone’s phones in my backpack, so had I fallen, it might’ve been a really bad day. A dry bag would prevent that.
At the beginning of the hike, they will offer you a hiking stick. Take it! It must’ve saved me from falling a dozen times – its slippery out there!
Also, keep in mind you are in a forest in Costa Rica – if you have ever needed bug spray and/or sunscreen, you will need it here.
How Much Does the Blue Falls of Costa Rica Cost?
Entrance fees for the Blue Falls of Costa Rica is $17 USD per person. If you plan to also visit Catarata Del Toro, then a combo ticket costs $25 USD per person.
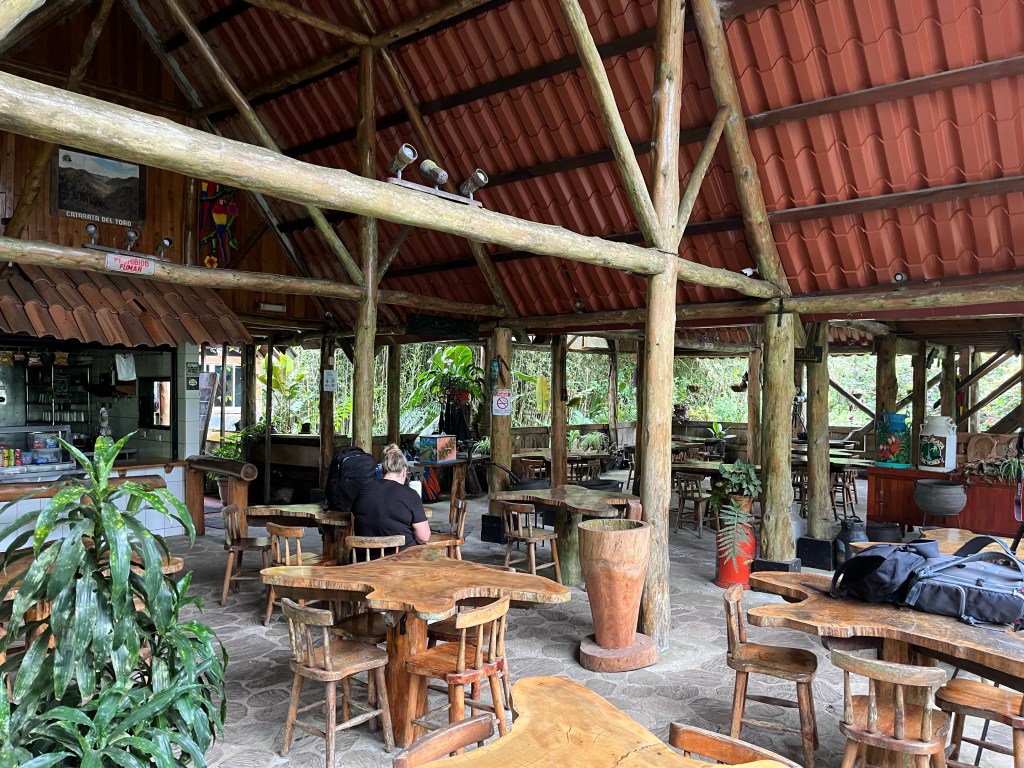
Where you pay to get in, there are a bunch of tables where you can eat. There is a snack bar, but it was closed that day, so I’m not sure I would count on them having food available.
Tables at the lodge
There are a couple of bathrooms in the back, and we used them to change our clothes after the hike. Pretty much anywhere you go when you leave the Blue Falls is going to be a long drive and you’ll want to be dry for that drive. Also, there aren’t any bathrooms on the trail itself, so you might want to use it before you head onto the trail.
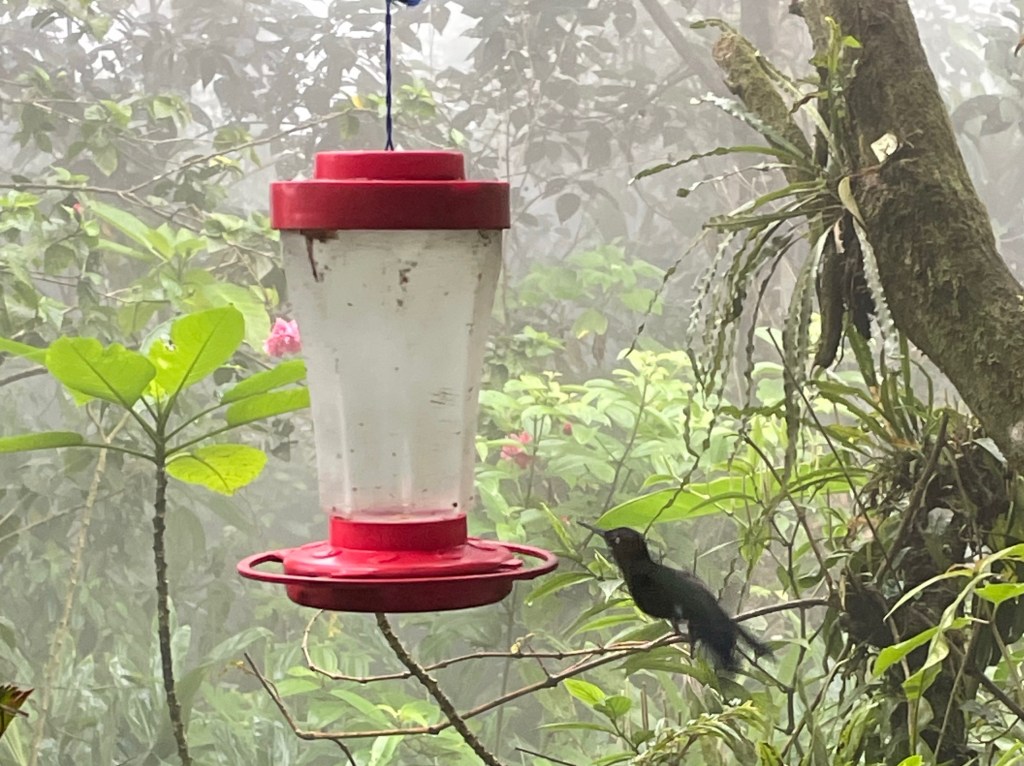
One of the hummingbirds at the lodge
I don’t know if tipping is customary, but we did leave a tip with the gentleman who was running the front desk. He asked us who the tip was for and we just let him know what falls we hiked at and he was happy to give the tip to the guides who were working those falls.
Hummingbird swooping in to the feeder
There is a hummingbird feeder in the lodge that gets a ton of activity with some very aggressive hummingbirds. Make sure you take a few moments to enjoy the hummingbirds as well.
Conclusion
If you have an opportunity to hike at the Blue Falls, jump at it. This was, by far, the most beautiful hike I have ever been on. Keep in mind that you should be in pretty reasonable shape to do the hike. It is wet, steep, and your balance will be challenged constantly.
Make sure that you come prepared and enjoy the beauty of Costa Rica. Pura Vida!
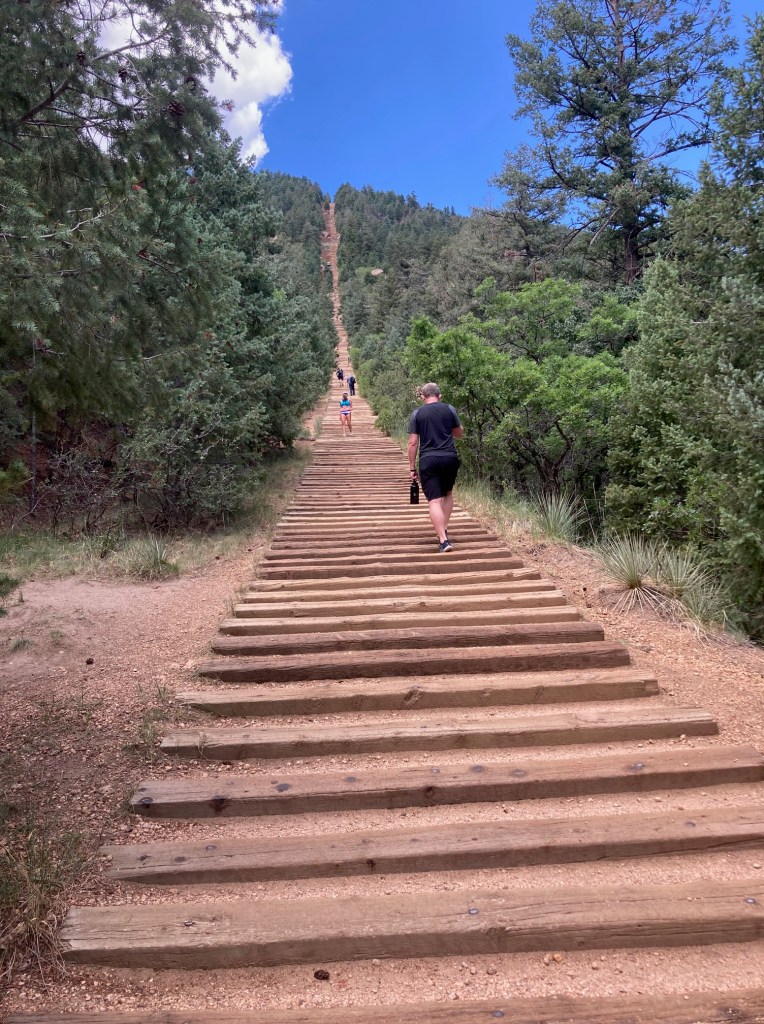
The Manitou Springs Incline is a popular hiking trail and fitness challenge located near Colorado Springs. It is a 2,000 foot climb over the length of a mile up of 2,744 steps made of railroad ties. The Manitou Springs incline is really the remains of a funicular railway built to access water tanks at the top of the mountain which provided water pressure for Manitou Springs. The railway was built in 1907. I don’t know if the water tanks are still in operation but I can only imagine how much water pressure was generated from a more than 2000 foot fall. The railway itself was abandoned after a rock slide took out the tracks in 1990 and the cog railway company decided not to rebuild it. Since the railway shutdown it slowly grew in popularity as a fitness challenge.
Whose Idea Was This?
We had been sitting in the covered patio area at Cerberus Brewing in Colorado Springs and struck up a conversation with a local couple. After mentioning the fact that we are runners and like to hike, they said “I bet you guys would love to do the Incline.” Once they explained a little about it and Jenn became intrigued by the idea – a 2,000 foot climb on 2,744 steps in around a mile? “Yes, we should totally do that!” she said while I stared at her, puzzled, a little scared. “Are you serious? Because I’m game if you are.” She got online and made the reservation for the next morning – I guess we’re doing this. This is stupid, right?
We left the kids at the camper because they had zero interest in torturing themselves that day. We checked in at the check in station (they only allow so many hikers per hour for safety reasons), and started the long walk up the stairs. The first thing you notice, is that the stairs are just railroad ties, as you get steeper on the hill, those railroad ties are held to each other by steel cables.
We started up the path, and we quickly noticed that there was a placard on step 100, well at least we’ll know how far we have to go. It was fairly obvious early that this was going to be more difficult than we expected. When we got there we were thinking it would take an hour to get to the top. By step 200, we were already taking fairly regular breaks, and an hour was out of the question.
Struggling with Thin Air
One of the problems was that the entire time we were in Colorado, Jenn and I seemed to be taking turns having issues with altitude. I was particularly surprised by my issues with the elevation, because I’d been higher before without any issues, and I was having breathing problems trying to sleep at 6,500 ft elevation, which was pretty unexpected for me. I mean I was training for a marathon at the time. On this day, however, I was having no issues and Jenn was struggling. She was light headed and breathing heavy. This was also unexpected, she had been training for a half marathon, and we had already been on some reasonably difficult hikes at higher elevations than this. This was really just bad luck that she was having elevation related issues that day.
We made it to step 500 at a little over a half hour and frankly I was pretty concerned, Jenn was really giving it everything she had, but was still struggling with the elevation, it honestly felt like we weren’t going to finish. I asked her if she wanted to bail out and she told me she was determined to finish. Alright, we’re doing this.
As steps started getting steeper in the middle, Jenn was actually speeding up. She was starting to hit her stride, and we began to care less about the difficulty and started to enjoy the hike. The views were more and more amazing as we were ascending. Our stops felt more like a way to get enjoy the view and less a desperate attempt to catch our breath.
The Friendly Ground Squirrels
On one of our stops, I opened up a Lärabar, and a ground squirrel came up to me. Apparently, these squirrels are super tame and have learned to beg for food. He grabbed it, and quickly gobbled it up. He was obviously very used to hikers and continued to hang around while we caught our breath, even posing for a couple of pictures.
Finishing the Incline
We kept up the path, which in spots were getting steep enough that I needed to use my hands. We went past step 1,500 then 2,000. By the time we were around 2,300 the summit was becoming visible. Just a little further.
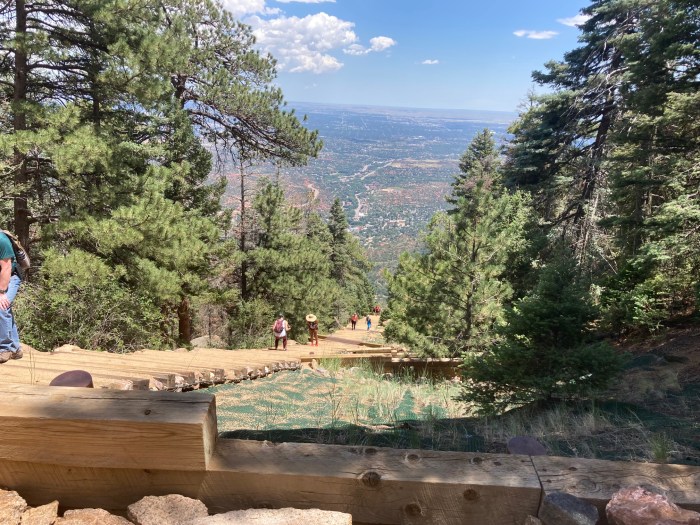
We made it all the way to the top, and the view is surreal. There is definitely a reason people are willing to torture themselves to do this. I’ve heard that on a clear day you can see Kansas, and while I don’t doubt that, it’s not like there’s some landmark to look for on the horizon. It was difficult to believe those tiny buildings down below us were from Manitou Springs where we started the hike.
I’m very proud of Jenn for finishing that hike. I knew she was having a bad day and she pushed through. On a different day, she probably would have enjoyed it more and honestly it probably would have taken half the time. She persisted through the light-headedness and shortness of breath.
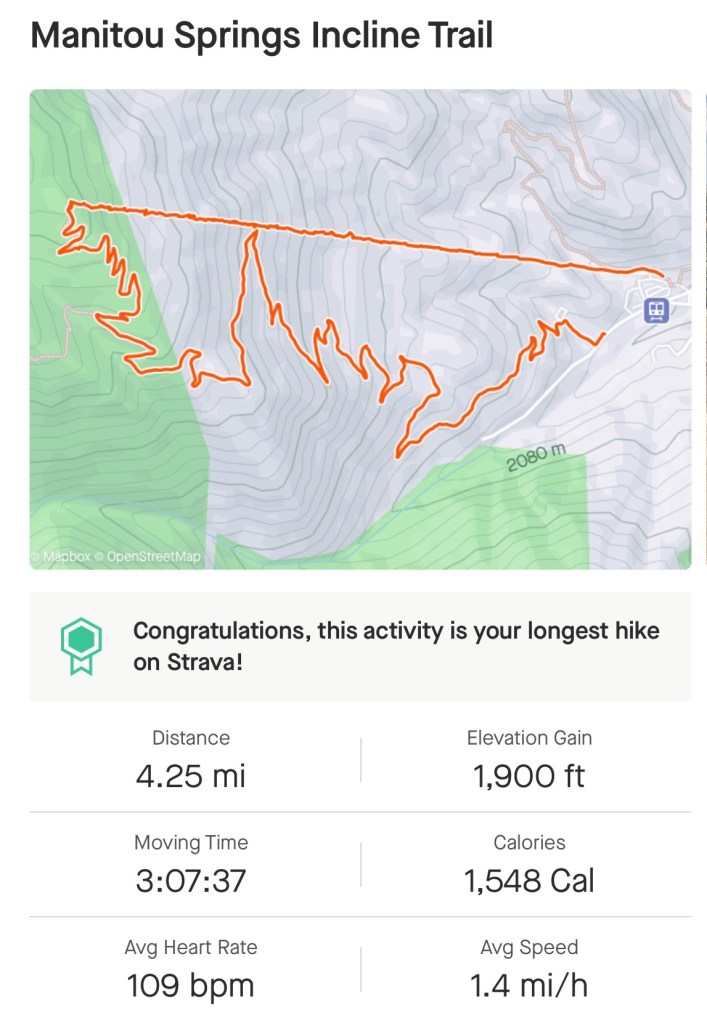
We proceeded down the 3 mile downhill trail to get back to the town and hopefully catch a drink since we had run out of water already. I believe the 4 mile hike took about 3 1/2 hours, which was definitely slower than the average hiker, but I’m okay with just finishing it. It’s a beast.
25 hikers every 30 minutes from 3:30 PM to 6:30 PM
Capacity from early November to mid March:
25 hikers every 30 minutes from 6 AM to 7 AM
45 hikers every 30 minutes from 7 AM to 8 AM
65 hikers every 30 minutes from 8 AM to 1 PM
45 hikers every 30 minutes from 1 PM to 2 PM
25 hikers every 30 minutes from 2 PM to 3 PM
I would recommend taking weather into account when making reservations. For example, during the summer, if the weather is likely to warm and sunny, you might want to start early in the morning when it’s a little cooler, because the heat might zap you of your energy.
How Long Does it Take to do the Manitou Incline?
The length of time it takes to do the Incline varies wildly. It took us around 2 hours and 30 minutes to reach the summit. That is definitely slower than average. The average is probably around 90 minutes. The record was set by Remi Bonnet in 2022. It took him a mindboggling 17 minutes 25 seconds. The record for a female was set by Allie McLaughlin in 2010 in a blistering 20 minutes 7 seconds. There are more Manitou Incline records here.
This is just to get to the top of the incline, there is a much easier 3 mile winding decline back to the parking lot that will probably take the average hiker just short of an hour.
In case you’re curious about how many calories you’ll burn on the Incline, according to Strava, I burned over 1,500. Keep in mind I weigh a little over 200 pounds, so if you weigh less than that, you will burn fewer calories and if you weigh more, you will predictably burn more. I’m sure there’s a good restaurant or two in Manitou Springs to replace those calories after burning them.
Can a Beginner do the Incline?
The Incline is a pretty serious hike. You need to be in pretty good shape to do the incline. Here are a few questions you should ask yourself before you attempt the Incline.
What overall cardiovascular shape am I in? This does require a decent, but not spectacular amount of cardiovascular health.
How flexible are I? These are not uniform steps, some are probably about 2 foot high, and while you don’t need to be a gymnast to be able to climb the steps, a decent amount of flexibility is important.
How acclimated to the elevation are you? If you are not very acclimated to the elevation, you might find yourself fighting for air. In that case, you will probably want to be in really good cardiovascular shape to attempt it. If you are acclimated to the elevation, cardiovascular health will be less important. In other words, a person who lives at elevation in Colorado Springs will probably not need to be in quite as good of cardiovascular health as someone who lives at much lower elevations, like Iowa, for example.
Where Do You Park for the Manitou Incline?
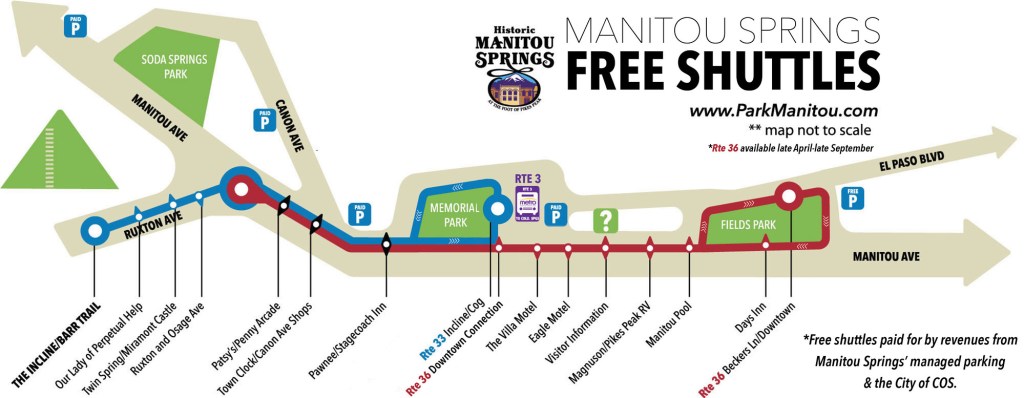
Paid parking is available at the Manitou Hiawatha Gardens parking lot. That shows up as the P icon located to the right of Memorial Park on the map below. As you can see, there is a free shuttle stop there that will take you to the base of the incline. Expect to pay around $2.50 per hour for parking in the Hiawatha Gardens lot.
Manitou Springs uses a kiosk system where you can pay with a credit card using a smart phone. This is really nice, because we were we found ourselves eating lunch after our hike when I received a text message telling me my time was expiring and asking me if I wanted to extend my time. I was able to pay for additional time right from my phone, without having to go back to the lot to extend the time. More information about parking in Manitou Springs can be found here.
What if I Can’t Finish the Incline?
There are plenty of people who don’t make it, so don’t feel too bad about not making it up the Incline, it’s a serious challenge. I saw a number of people who were walking down the stairs, which does get increasingly difficult as you move up the incline and it gets steeper. More importantly there are three bailout points along the path. The first bailout point is at step 395 and the second bailout is at step 1300. Each of these bailout points connects to the Ute Pass which is a gentle decline back to the base of the trail. The third and final bailout point is at step 1800 and ties back to Barr Trail.
There are no bailouts past step 1800, so you should do a real gut check at that point to decide if you can finish. That bailout a little more than halfway to the end and it gets increasingly steep from that point, so the further you get from step 1800 the harder it is to return to the bailout (and the closer you are to finishing).
What should I Wear on the Incline?
When dressing for the incline, you need to realize a few things.
Dress for the weather – you’ll be out there for a while and there isn’t going to be any air conditioning or heating along the way. You will be exposed to the wind and sun with no shade for most of it.
We wore running shoes, but it would have been useful to have some shoes with a little more grip. There is a lot of loose sand on the trail and falling is a distinct possibility. Trail shoes are probably more appropriate than running shoes.
You are going to be taking some big steps and you’re going to want to have clothes that give you freedom of movement. Tight jeans would probably be a poor choice, for example.
It is helpful for someone in your group to have a backpack so you can store extra water, snacks, and maybe some extra clothes. It also doesn’t hurt to have some a first aid kit and some sunscreen.
Are There Bathrooms on the Manitou Incline?
No, there are no bathrooms on the Incline, so you should take that into account before starting the hike. There are porta-potties near the entrance that you should use before starting the Incline.
So is The Incline Worth it?
Below is a great video made by The Twins Wolfe about the Incline. It gives you a great idea of just how hard but also rewarding this hike can be.
Not Challenging Enough? Keep Going on the Barr Trail to Pike’s Peak
Once you finish the Incline, you will meet up with the Barr Trail, which is the path that goes from Manitou Springs to the top of Pike’s Peak (elevation 14,115’). Most hikers exit the incline by going down the Barr Trail to the beginning but you can use the Incline as a “shortcut” and trade an extra 2 miles of hiking for an intense climb. From there, no big deal, it’s just a little more than 9 miles and 5500 of elevation to Pikes Peak. If you can do that, my hat’s off to you. You’re a certified badass.
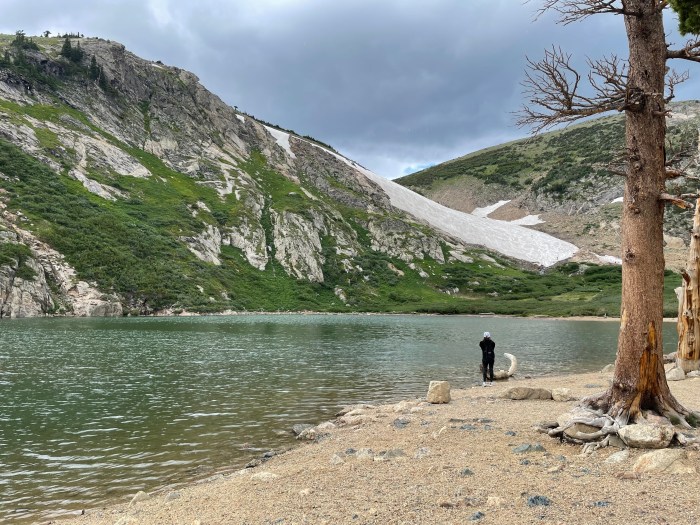
Is there anything more breathtaking than a mountain lake? There is something indescribably beautiful about still clear waters surrounded by mountain peaks. Add in some melting snowpack nearby, I mean wow, what can be more gorgeous than that? St Mary’s Glacier is all of those things and if you can, this is a must-do hike.
The glacier is on the backside of the lake from the trail.
We had already done a hike at Maxwell Peak that morning and decided to drive out to Idaho Springs and do St Mary’s Glacier. It’s a fairly short hike, about a mile and a half to the lake and back with an elevation change of about 750 feet. That seemed pretty doable on a shortened schedule.
Strava Stats for this hike
The drive out there was a little scary for us Iowa folks. There was a lot of switchbacks and it seemed like one wrong turn could mean plummeting to our deaths. The kids were enjoying the scenery but I was white knuckled on the steering wheel and Jenn was definitely a nervous passenger. The truck didn’t seem to enjoy the drive either. I think the combination of the elevation and the slope was pretty hard on my truck because it smelled like antifreeze when we parked. There is a parking lot near the trailhead, which was sketchy at best, with potholes that you could lose a subcompact car in. I would definitely take into consideration what kind of car you were driving to get to the trailhead. The drive up there will test your drivetrain, the parking lot will test your suspension, and the drive back will test your brakes, so make sure you feel good about what you’re driving.
The rocky path up to the lake
There is a five dollar fee to park in the lot, we paid that and began the trek up the path to the lake. This is definitely a popular hike so there were a lot of people doing this hike with us. That’s usually not great for Sadie who is great with people, but not great with other dogs. The trail is wide, however, which allowed me to steer her away from those dogs.
St Mary’s Lake
The path itself is steep and rocky. You should probably be in decent shape to hike this. This is over 10,000 feet, so the air is fairly thin and the slope is steep enough to get most hikers breathing heavy. There are large rocks everywhere which essentially meant that there was a constant danger of an ankle twist or a slip and fall, so slow and steady is the way to go.
You can continue to climb up the mountain after arriving at the lake, we did not.
After a little over a half mile, the rocks begin to be more sparse and the grade becomes less steep. The peak and the glacier suddenly come in to view and then finally the lake itself. There are many places in this world where you see something so beautiful that you forget to breathe for a second. This is one of those spots. I had seen pictures, but they just don’t do it justice.
This cliff face is a popular place to cliff dive
There was a lot of activity going on around the lake. On the far side of the lake, there were some skiers who were skiing down the glacier, then taking their skis off and hiking back up to the top of the glacier. There were some climbers attempting to get to the top of the peak. There was also a group of a couple dozen young people who were cliff diving into the lake on the back side of the lake. I waded into the lake a little and as I imagined, it was pretty cold, so those divers were definitely brave.
Skiers on a glacier in July
Cliff Jumping into the lake
We had a great time hanging around the lake and especially watching those crazy divers, but in typical Colorado fashion the sky started to darken and Sadie was becoming real nervous. It was time to leave, like 15 minutes ago. We got halfway down the trail and it started to downpour. It was a thunderstorm and Sadie was not a happy puppy. By the time we got back to the car, we were all soaked and freezing and Sadie hasn’t talked to us since.
Everyone is in good spirits, but that dark cloud is ominous.
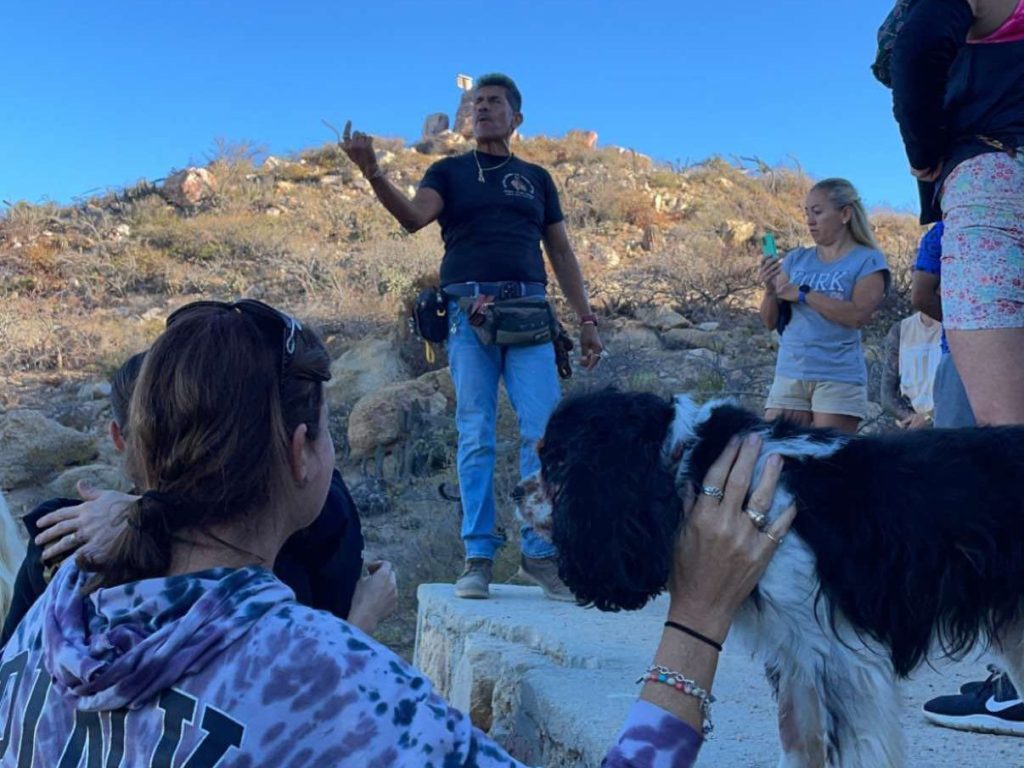
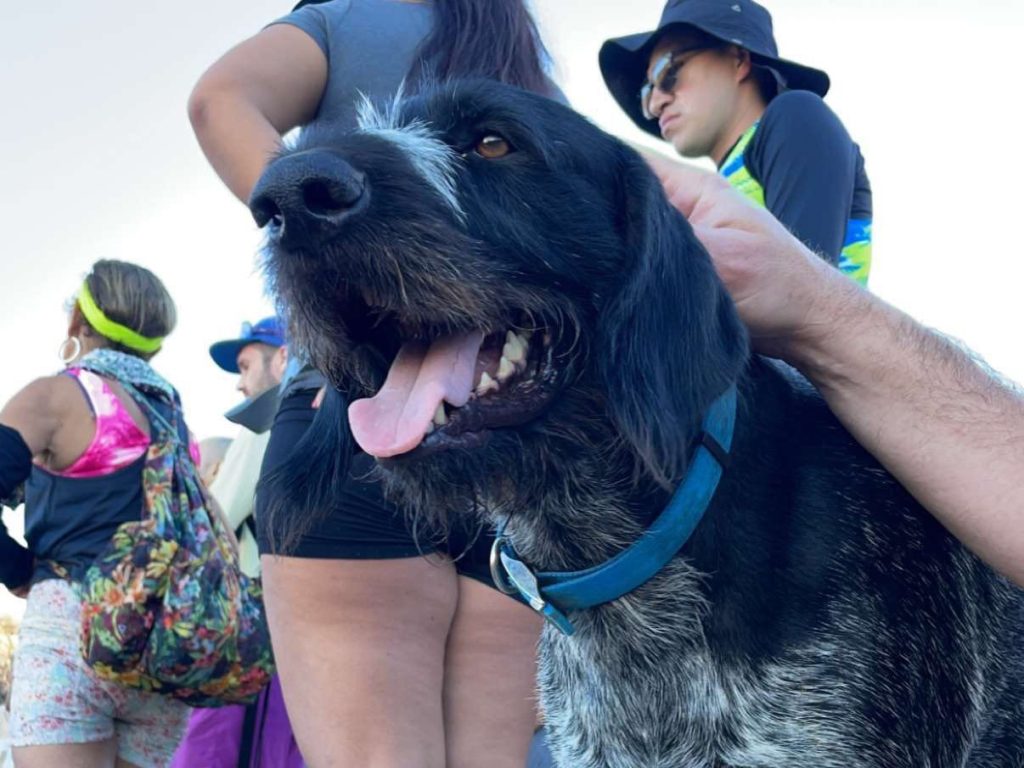
Mt Solmar is a rocky peak 544 feet above the ocean at the very tip of Baja Peninsula where the Pacific Ocean meets the Sea of Cortez. It is the home of a well traveled hiking path with spectacular views of the not only the Sea of Cortez and the Pacific Ocean but also most of Cabo San Lucas itself. Mt Solmar is entirely on private property and the hike is guided and takes place at 8:15 AM daily except for on Saturdays.
Enrique is the guide on these hikes. There is no cost to do the hike, but there is a mailbox where you are invited to tip at the end of the hike. I have no idea what the expected tip is for this, I think I tipped the equivalent of $5 US each, but honestly that could be on the low side, I just don’t know. There were probably somewhere in the neighborhood of 70 hikers on the morning that we went. If this was ever a secret, than this secret is getting out. I don’t know if Enrique ever turns people away because they are full, but I can’t imagine him allowing many more people than that on the hike.
I had heard about this hike on YouTube and was not only excited about the hike itself, but also because the hike was always done with a dozen or so dogs. Who doesn’t want to go on a hike with a bunch of dogs, right? Enrique starts out the hike with a short lecture on the history of the area mixed with philosophy and religion. To be honest, I was having a hard time following him, because I was too busy watching all the dogs running around excitedly, darting in between all of the hikers. They obviously love doing this hike and they were definitely ready to go.
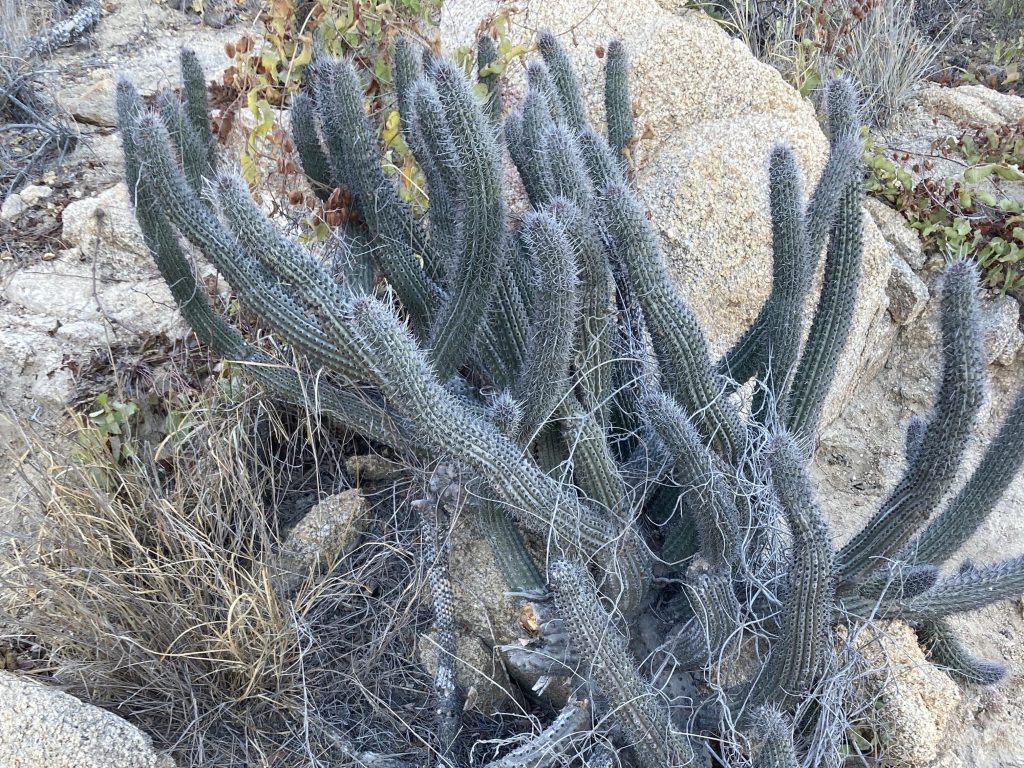
While Enrique was giving the initial talk, I did manage to hear why the dogs go on the hike. Essentially, they are there to scare away the snakes, which I was grateful for, but I wasn’t thinking about snakes before and now I was. He let us know which snakes to worry about and which ones not to worry about, but I’ll be honest with you, I avoid all snakes, even little garter snakes. My philosophy on snakes has always been that they walk without legs, they’re evil and you should kill them with fire. So after Enrique was done freaking me out, we started on the hike.
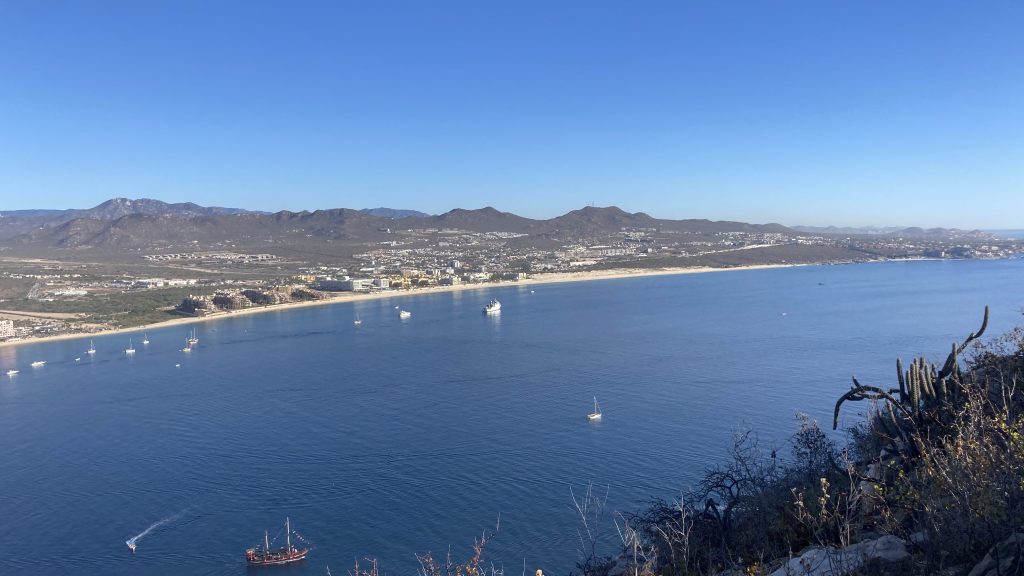
The first half of the hike is a fairly gentle climb on a rocky and sandy path with brush on both sides. Moving up the hill, the views of the Sea of Cortez and the marina slowly become more and more impressive. You also start to see more of Cabo San Lucas as well. The dogs pretty much lead this hike with Enrique also in the front. This was the easy part of the hike. After maybe around 15-20 minutes, Enrique stopped on a concrete slab and talked some more about the history of the area and again I got distracted by the dogs, because now the dogs were running back and forth between people getting pet by as many people as they could. I was happy to oblige.
After the stop, we went on the more difficult part of the hike. In many parts of the second half of the hike, it was more of a climb than a hike and we definitely were using our hands. There are quite a few spots where I felt a little apprehensive because I was walking on fairly polished rocks with sand on them in a pretty steep area. It did feel like there was some chance of me slipping and falling down the hill a few feet. It was moderately challenging, I would imagine that for experienced hikers this was fairly easy and for people with little to no experience this might seem impossible.
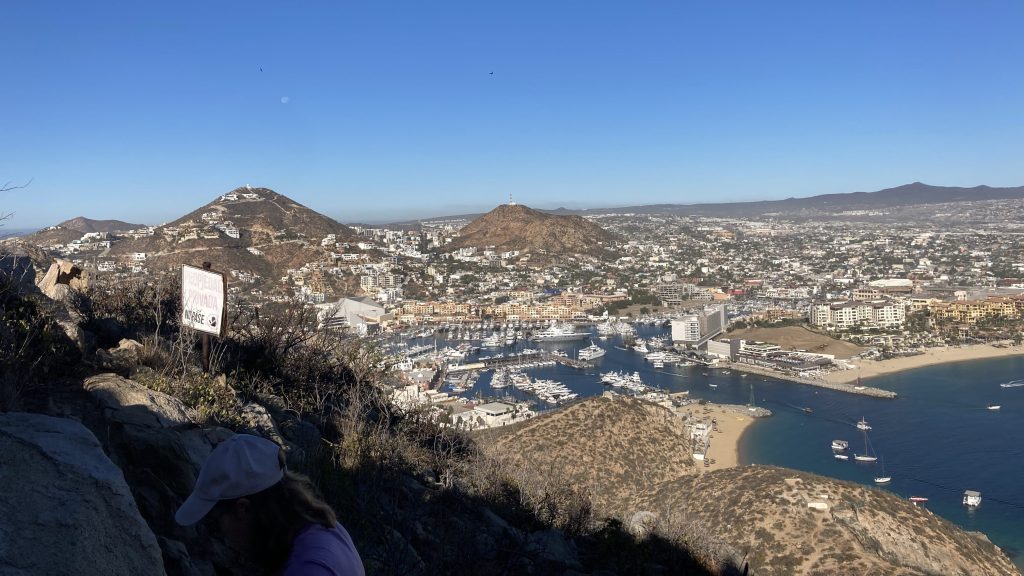
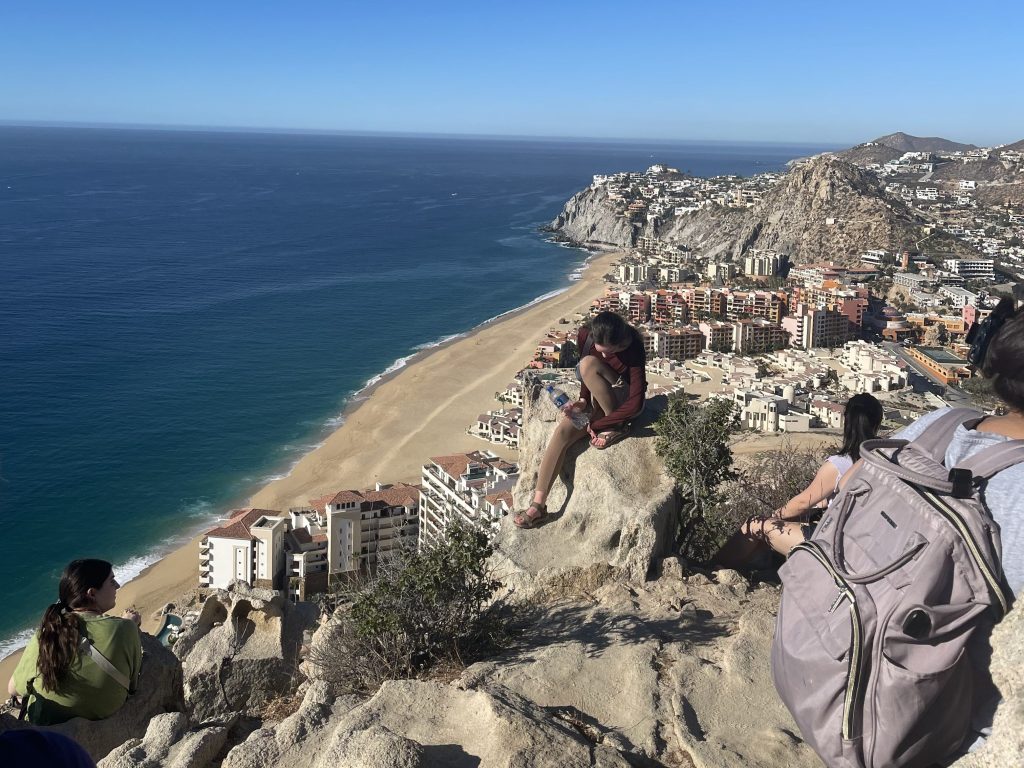
All of the work to get up the hill is paid off in a big way. When you get to the top of Mt Solmar, you are greeted with sweeping 360 degree views of the Pacific Ocean, Sea of Cortez, Cabo San Lucas, as well as Lover’s Beach and Divorce Beach directly below.
The top of the hill is fairly large, but there are large boulders everywhere and you have to negotiate around those as well as the other hikers to get the chance to stand on the viewpoints.
There are also views of the Pedregal area on the other side of the hills that border the Pacific beaches.
After about 20-30 minutes at the top of Mt Solmar, we began the trek down the hill. Enrique said we were going down the easy way, which was probably easier, but not easy. It was rocky, uneven and steep in some places. It definitely helps to be both tall and flexible on the way down. There are spots where you will be taking steps that are 3 feet down and there are plenty of places where you could twist an ankle or fall. After about 20 minutes hiking down we found our way to the entrance and left.
If you are thinking about hiking Mt Solmar, I would not only dress appropriately with comfortable hiking shoes and clothes, but bring along a large bottle of water. You will need it. I would also recommend that you think about whether you are fit enough for the trek. We are both runners and we didn’t struggle with the cardio part of the hike, but we did struggle with the flexibility and coordination aspect. You should keep that in mind before you show up for the hike. That being said, if you do feel you are in shape enough to handle it, it is a unbeatable view.


Leave a comment